Description
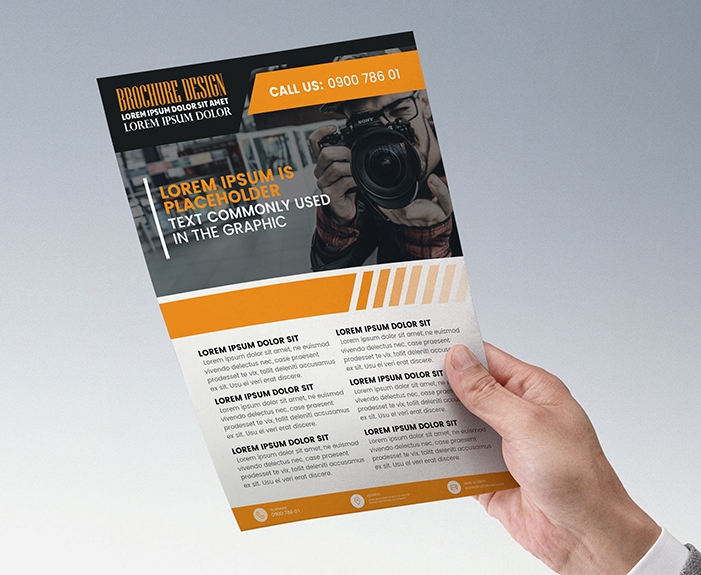
Photographing Flyer Designs
Introduction:
Photographing Flyer Designs Is Essential For Showcasing Your Work To Clients Adding To Your Portfolio Or Promoting Your Design Services. A Well-Executed Photograph Can Enhance The Visual Appeal Of Your Flyers And Highlight Key Design Elements Effectively. In This Guide We’ll Explore Some Essential Tips And Techniques For Photographing Flyer Designs To Ensure Professional-Quality Images That Capture Attention And Impress Your Audience.

Choose The Right Setting:
Selecting The Appropriate Setting For Photographing Your Flyer Designs Is Crucial For Achieving High-Quality Results. Consider The Following Factors:
Lighting:
Natural Light Is Often The Best Option For Photographing Printed Materials Like Flyers. Choose A Well-Lit Area With Ample Natural Light Such As Near A Window Or Outdoors In A Shaded Area. Avoid Harsh Direct Sunlight As It Can Cause Glare And Shadows On Your Flyers.
Background:
Choose A Clean And Neutral Background That Complements Your Flyer Design Without Distracting From It. A Solid-Colored Backdrop Or A Simple Surface Like A Wooden Table Or White Wall Works Well For Most Flyer Photography.
Environment:
Consider The Overall Environment And Ambiance Of The Setting. Ensure That There Are No Cluttered Or Distracting Elements In The Background That Could Take Focus Away From Your Flyer Design.
Use Proper Equipment:
Investing In The Right Equipment Can Significantly Impact The Quality Of Your Flyer Photography. Consider The Following Essentials:
Camera:
While A High-Quality DSLR Camera Is Ideal For Professional-Grade Photography You Can Also Achieve Satisfactory Results With A Smartphone Camera Especially Newer Models With Advanced Features.
Tripod:
Using A Tripod Helps Stabilize Your Camera And Ensures Sharp Blur-Free Images Especially In Low-Light Conditions Or When Shooting With Slow Shutter Speeds.
Lens:
Choose A Lens With A Focal Length That Allows You To Capture Your Flyer Designs With Clarity And Detail. A Standard Prime Lens Or A Zoom Lens With Macro Capabilities Works Well For Photographing Printed Materials.
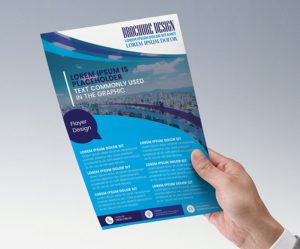
Pay Attention To Composition:
Composition Plays A Crucial Role In Creating Visually Appealing Flyer Photographs. Follow These Composition Guidelines:
Center Your Flyer In The Frame And Ensure That It Fills The Majority Of The Image Without Being Cropped Or Cut Off.
Use The Rule Of Thirds To Position Key Elements Of Your Flyer Design Along Intersecting Points Or Lines For A Balanced Composition.
Experiment With Different Angles And Perspectives To Find The Most Flattering And Dynamic Views Of Your Flyer Design.
Leave Some Negative Space Around The Flyer To Prevent The Image From Feeling Crowded And To Draw Attention To The Main Subject.
Mindful Of Reflections And Glare:
Minimize Reflections And Glare On Your Flyer Designs To Ensure Clear And Distortion-Free Images. Here’s How:
Position Your Flyers In A Way That Minimizes Glare From Overhead Lights Or Windows. Adjust The Angle And Orientation Of Your Flyers As Needed To Reduce Reflections.
Use A Polarizing Filter On Your Camera Lens To Reduce Glare And Reflections Especially When Photographing Glossy Or Laminated Flyer Designs.
Experiment With Different Lighting Setups And Angles To Find The Most Flattering And Glare-Free Lighting Conditions For Your Flyer Photography.
Ensure Sharp Focus And Detail:
Achieving Sharp Focus And Capturing Fine Details Are Essential For Showcasing The Quality And Craftsmanship Of Your Flyer Designs. Follow These Tips:
Use Manual Focus Or Autofocus Settings On Your Camera To Ensure That Your Flyer Designs Are Captured With Precision And Clarity.
Pay Attention To Depth Of Field And Aperture Settings To Ensure That Key Elements Of Your Flyer Design Remain Sharp While Background Distractions Are Blurred.
Consider Using A Macro Lens Or Close-Up Photography Techniques To Capture Intricate Details Textures And Typography In Your Flyer Designs With Precision And Clarity.
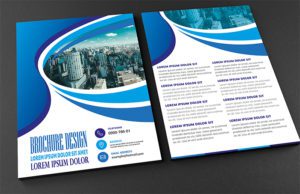
Edit And Enhance Your Images:
Post-Processing Can Help Enhance The Visual Impact Of Your Flyer Photographs And Ensure Consistency Across Your Portfolio. Consider The Following Editing Techniques:
Adjust Brightness Contrast And Exposure To Correct Any Lighting Inconsistencies And Ensure Optimal Visibility Of Your Flyer Designs.
Fine-Tune Colors And White Balance To Accurately Represent The Hues And Tones Of Your Flyer Designs.
Crop And Straighten Your Images To Remove Any Unwanted Distractions And Ensure A Clean And Polished Presentation.
Sharpen Details And Reduce Noise To Enhance Clarity And Visual Appeal Especially When Photographing Small Text Or Intricate Design Elements.
Conclusion:
Photographing Flyer Designs Requires Careful Attention To Detail Composition And Lighting To Capture Professional-Quality Images That Showcase Your Work Effectively. By Choosing The Right Setting Using Proper Equipment Paying Attention To Composition Minimizing Reflections And Glare Ensuring Sharp Focus And Detail And Editing Your Images Thoughtfully You Can Create Visually Stunning Photographs That Highlight The Creativity And Craftsmanship Of Your Flyer Designs. With Practice And Experimentation You Can Develop Your Photography Skills And Create Compelling Images That Elevate Your Portfolio And Attract Clients And Collaborators.

Feedback & Discussion