![]()
Quick Summary:
Problem: Low-res PNG logos look blurry when enlarged bad for print and branding.
Solution: Convert PNG to vector (SVG/EPS) using free tools like Inkscape or online converters.
Result: Infinitely scalable logo that stays sharp at any size perfect for web, print, and merchandise.
Table Of Content:
Introduction
when it comes to converting low-resolution PNG logos into professional vector graphics, the challenge isn’t technical anymore; it’s about choosing the right workflow. Every day, small business owners, content creators, and freelance designers face the same frustration: a pixelated logo that looks great at thumbnail size but falls apart when scaled for print, signage, or large-format media.
The problem is real. A low-resolution PNG logo typically at 72 pixels per inch (ppi) or less loses quality instantly when enlarged. You see blurriness, jagged edges, and that unmistakable “cheap” appearance. Print shops reject it. Web developers complain about image bloat. Your brand suffers.
💡 Key Insight
Vector logos are non-negotiable for professional branding. They scale without degradation, work across all platforms (web, print, mobile, billboard), and reduce file-size bloat. A vector logo is a one-time asset that pays dividends for years.
Here’s what this guide delivers: a clear, step-by-step path to convert your low-res PNG logo into a clean, infinitely scalable vector (SVG or EPS) using only free or affordable tools. No Adobe Illustrator subscription required. No advanced design experience needed. Just proven methods, honest trade-offs, and practical next steps.
Understanding Raster vs. Vector Graphics
Before you convert, you need to understand why conversion works and what you’re gaining.
What Is a Raster Image?
A raster image (also called a bitmap) is a grid of colored pixels. Each pixel holds one color value. When you take a photo on your phone or download a logo from the web in PNG, JPEG, or GIF format, you’re getting a raster file.
⚠️ The Raster Problem
Raster images are resolution-dependent. When you enlarge a raster image, the software must guess what the new pixels should be. It either duplicates pixels (making the image blocky) or blurs them (making edges soft and fuzzy). Either way, you lose sharpness.
Common raster formats: PNG, JPEG, GIF, WebP, TIFF.
What Is a Vector Image?
A vector image is built from mathematical paths and equations, not pixels. Instead of storing colors in a grid, vectors store instructions: “Draw a red circle here. Draw a blue curved line there. Fill this area with green.”
Because vectors are defined by math, not pixels, they scale infinitely. You can enlarge a vector logo to cover a billboard or shrink it to fit a favicon it stays perfectly sharp.
Common vector formats: SVG (Scalable Vector Graphics), EPS (Encapsulated PostScript), PDF, AI (Adobe Illustrator).
| Aspect | Raster | Vector |
|---|---|---|
| Structure | Grid of pixels | Mathematical paths |
| Scalability | Degrades when enlarged | Infinitely scalable |
| Best for | Photos, detailed artwork | Logos, icons, text, illustrations |
| File size | Large (high resolution) | Small (path-based) |
| Editability | Destructive (hard to edit) | Non-destructive (easy to edit) |
| Print quality | High (if resolution ≥300 dpi) | Professional (resolution-independent) |
| Web performance | Heavier; slower load | Lighter; faster load |
The key insight: Raster is fixed. Vector is fluid. For logos, vector always wins.
Preparing Your PNG Logo for Conversion
Not all PNG files convert equally. A low-res PNG with noise, shadows, and gradients will produce a messy vector. A clean, high-contrast PNG will vectorize beautifully.
Assessing Your PNG
Before you invest time converting, ask these questions:
- What is the resolution? Check the image dimensions in pixels and DPI. Ideally, your PNG should be at least 600–1000 pixels wide and 300 dpi (or close to it). If it’s 250×250 pixels at 72 dpi, you’re starting with a handicap, but vectorization can still help.
- Is there a background? A PNG with a white, solid, or transparent background is easier to convert than a PNG embedded in a busy design. Use remove.bg (free online tool) or GIMP to isolate your logo from any background noise.
- How complex is the design? Simple logos (flat shapes, 2–3 solid colors) vectorize cleanly. Complex logos with gradients, shadows, textures, or fine details will require manual cleanup after tracing.
Cleaning Up Your PNG
Use free photo editors to improve your source file before vectorization:
- GIMP (open-source, free): Sharpen edges, increase contrast, remove noise, delete background.
- Photopea (free, browser-based Photoshop alternative): Similar tools, no installation.
- Remove.bg (free online): Instantly remove backgrounds.
Quick Cleanup Steps
- Open your PNG in GIMP or Photopea.
- Use Brightness/Contrast to make the logo darker and the background whiter (or fully transparent).
- Use Sharpen (Filter → Enhance → Sharpen) to crisp up edges.
- Crop to remove excess white space.
- Export as PNG and move to the next step.
Pro tip: If your logo has multiple colors, consider simplifying it to solid colors before vectorization. Gradients and textures make tracing messy and require extensive manual editing afterward.
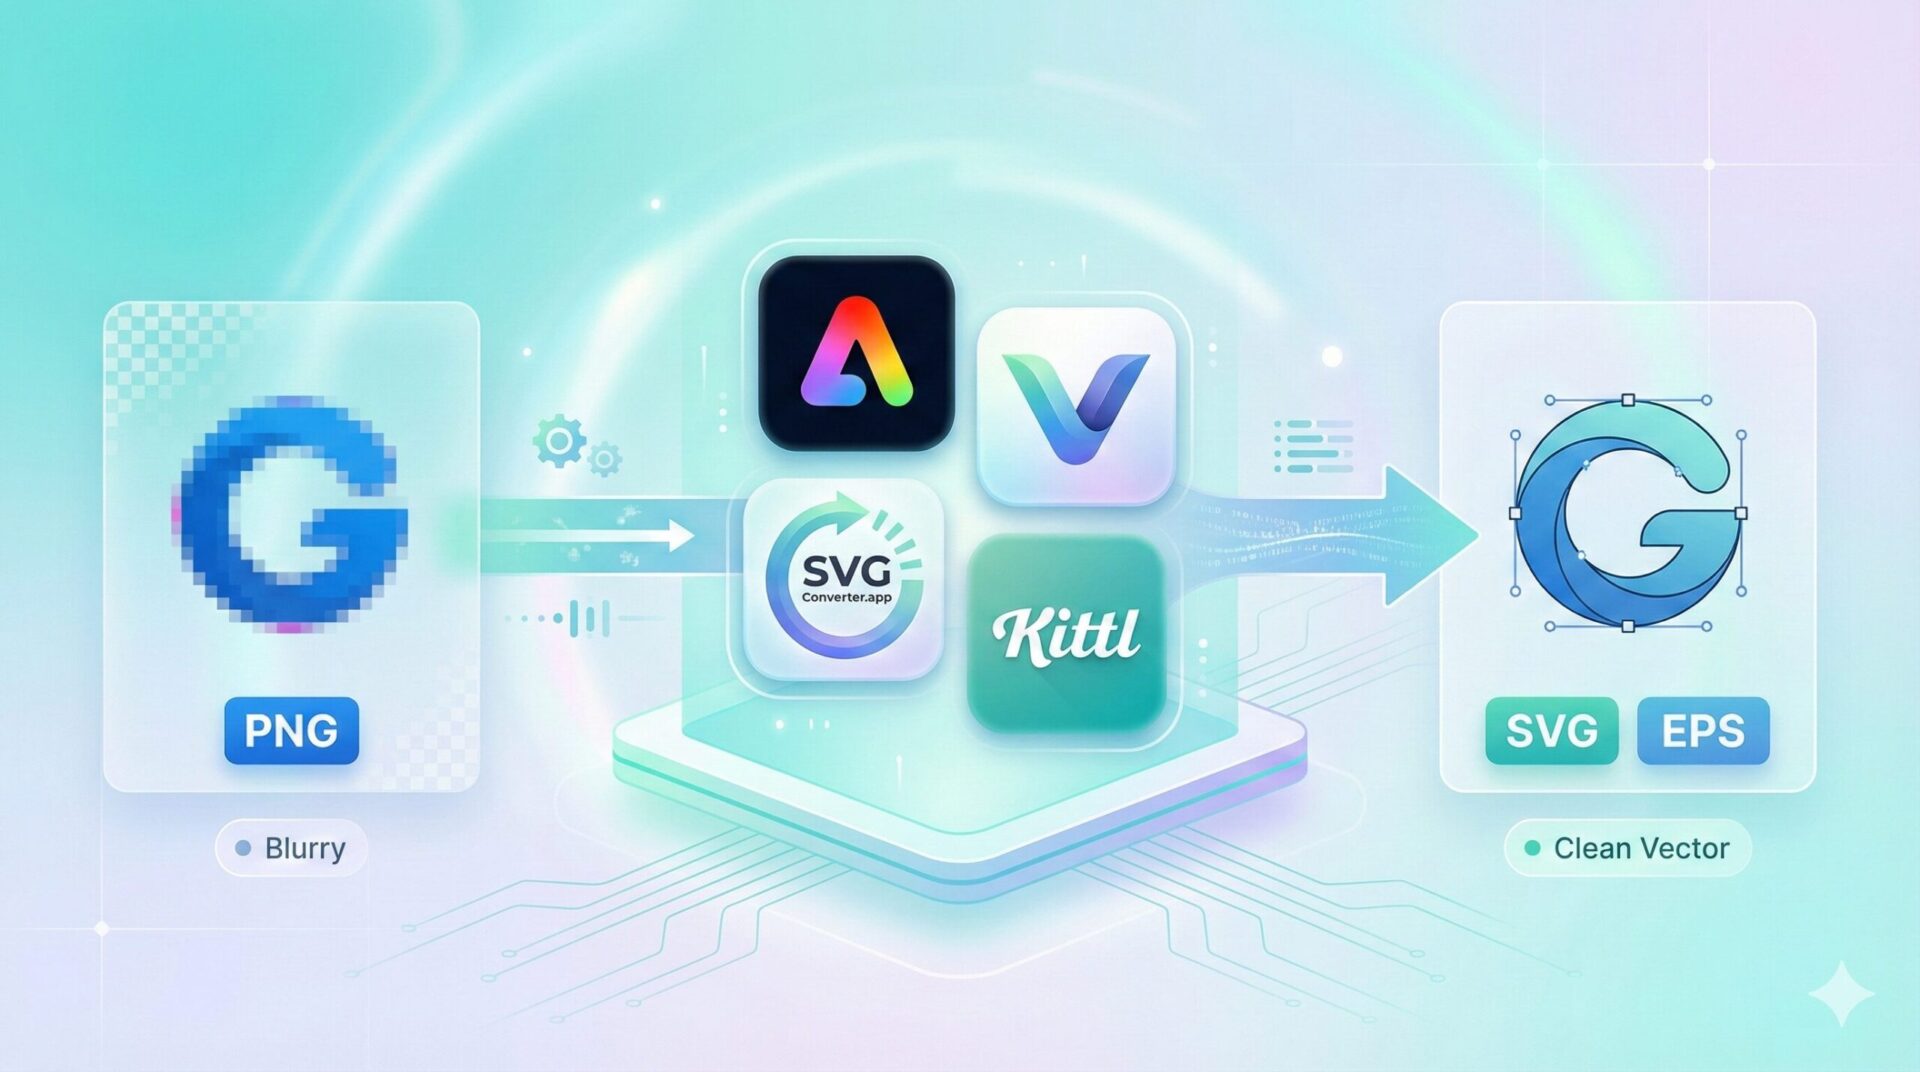
Method 1: Free Online Vector Converters
For quick, low-friction conversion, online tools are ideal. They require no software installation and work on any device.
Best Online Converters
Adobe Express PNG to SVG Converter
- Upload PNG → download SVG instantly.
- Strengths: Fast, user-friendly, respectable quality for simple logos.
- Weaknesses: Limited control; may require cleanup.
Vectorizer.AI
- Uses AI-powered tracing for full-color conversion.
- Outputs: SVG, PDF, EPS.
- Strengths: High-quality results for multi-color logos; excellent for complex designs.
- Weaknesses: Free tier has limits; premium tier required for large files.
SVGConverter.app
- Free, no registration required.
- Supports SVG, AI, EPS, PDF output.
- Strengths: Fast; full-color support; clean interface.
- Weaknesses: No preview before download.
Kittl AI Vectorizer
- Browser-based, edit colors and details online.
- Converts to SVG or PDF.
- Strengths: Online editing; live preview.
- Weaknesses: Subscription model for advanced features.
Online Conversion Workflow
- Upload your cleaned PNG to your chosen tool.
- Adjust settings (if available): threshold, color count, smoothing, detail level.
- Preview the result (if the tool offers it).
- Download as SVG or EPS.
- Inspect the output in your vector editor (Inkscape, Illustrator, Figma).
- Clean up any rough paths or artifacts.
📊 Honest Assessment
Online converters are 70–80% of the way there. For a simple, flat logo, they may require zero post-conversion cleanup. For complex logos, expect 30–60 minutes of manual path refinement.
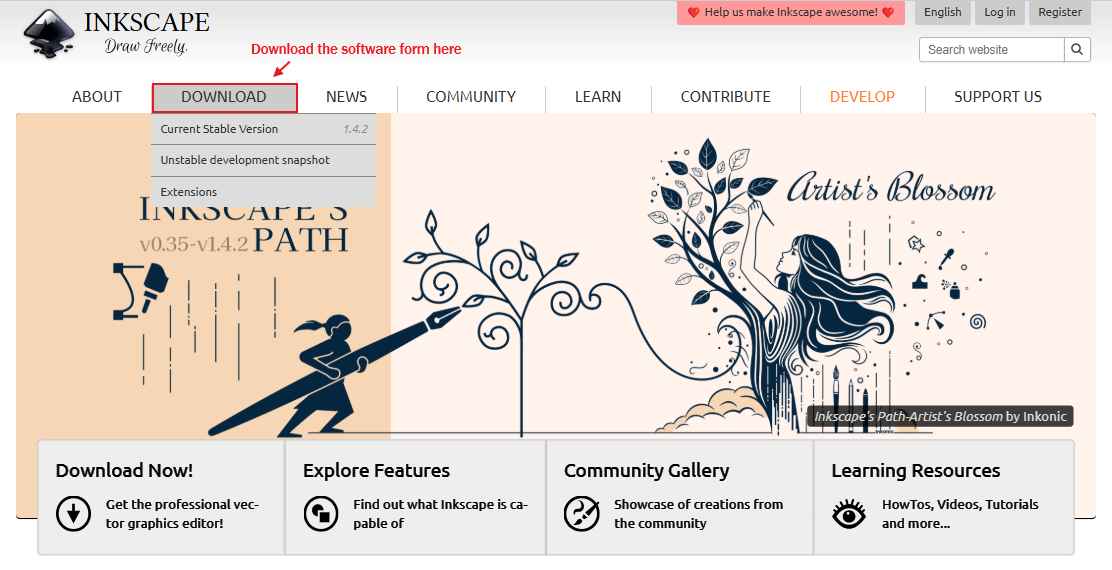
Method 2: Inkscape Desktop Software
For maximum control and repeatability, Inkscape (free, open-source) is the gold standard alternative to Adobe Illustrator. It’s professional-grade, runs on Windows, Mac, and Linux, and has a robust “Trace Bitmap” feature.
Installing Inkscape
Download from inkscape.org (free). Installation takes 2 minutes. No license key, no monthly subscription.
Step-by-Step Trace Bitmap in Inkscape
Step 1: Import Your PNG
- Open Inkscape.
- Go to File → Import (or Ctrl+I / Cmd+I).
- Select your cleaned PNG logo.
- Click Open.
Your PNG now appears as a raster image on the canvas.
Step 2: Trace the Bitmap
- Select the PNG image (click it).
- Go to Path → Trace Bitmap (or right-click → Trace Bitmap).
The Trace Bitmap dialog opens.
Step 3: Configure Tracing Settings
The dialog has several scan modes:
- Brightness Cutoff (single scan): Best for simple black-and-white logos. Adjust the threshold slider to control which pixels become “on” (part of the logo) and which become “off” (background).
- Colors (multiple scans): Best for multi-color logos. Increase the color count to capture more of the original logo’s colors.
Pro Adjustment:
- Start with the Brightness Cutoff at 0.5.
- Click Update (bottom left) to preview the result live.
- When satisfied, click OK.
Step 4: Clean Up the Output
After clicking OK, Inkscape creates a new vector shape on top of your original PNG. You’ll see both layers on the canvas.
- Move the new vector shape to the side (use the selection tool to drag it).
- Delete the original PNG (select it, press Delete).
- Switch to Edit paths by nodes tool (N key or toolbar).
- Inspect the vector paths for rough edges, extra nodes, or artifacts.
- Delete unnecessary nodes or adjust curves as needed. Simplify paths (Path → Simplify) to remove redundant nodes and reduce file size.
Step 5: Adjust Colors
If your logo was traced in black, recolor it to match your brand.
- Select the shape (selection tool, V key).
- Right-click → Fill and Stroke.
- In the Fill tab, choose a solid color or use the eyedropper to match your brand color.
Step 6: Save as Vector
- Go to File → Save As.
- Choose Optimized SVG (for web) or Encapsulated PostScript (.eps, for print).
- Click Save.
You now have a true vector logo.
Why Inkscape Wins for Control
- Live preview during tracing settings adjustment.
- Manual node editing for pixel-perfect refinement.
- Layer management for complex multi-part logos.
- Export flexibility: SVG, EPS, PDF, and more.
- Batch tracing: Apply the same settings to multiple PNGs.
- Zero cost.
Learning curve: Beginners need 15–30 minutes to feel comfortable; intermediate users thrive immediately.
Cleaning and Refining Your Vector Logo
Automatic tracing is rarely perfect. Plan to spend 20–60 minutes refining, depending on complexity.
Simplifying Paths
After tracing, your vector may contain hundreds of unnecessary nodes (anchor points). These make the file larger and harder to edit.
In Inkscape:
- Select the vector shape.
- Go to Path → Simplify (Ctrl+L / Cmd+L).
- Repeat until the shape looks clean but remains sharp.
Simplification reduces file size by 30–50% without visible quality loss.
Adjusting Curves and Nodes
For rough edges or unnatural curves:
- Select the Edit paths by nodes tool (Inkscape: N; Illustrator: A + click path).
- Click a problematic node to select it.
- Drag the node’s control handles (the small circles) to smooth the curve.
- Delete unwanted nodes by right-clicking → Delete.
This step is tedious but essential for professional output. Budget 1–2 minutes per node issue.
Color and Fill Adjustments
Solid fills usually convert cleanly. Gradients and patterns require manual recreation in the vector editor.
Best practice: If your original PNG had a gradient, consider simplifying it to a solid color during the PNG cleanup phase (reduce time investment later).
Exporting and Using Your Vector Files
File Format Strategy
| Format | Best For | Notes |
|---|---|---|
| SVG | Web, digital, responsive design | Lightweight, editable in code, works in all browsers |
| EPS | Print, professional use, Illustrator workflows | Industry standard; preserves all vector data |
| Print, client sharing, archival | Universal; preserves quality; less editable | |
| AI | Adobe Illustrator only | Proprietary; preserve for future edits |
Recommendation: Export both SVG (for web and digital) and EPS (for print and backup). Keep an editable master file in Inkscape (.svg or .eps).
Export Settings
SVG Export (Inkscape):
- File → Save As → Select “Optimized SVG.”
- Leave defaults (Inkscape handles optimization well).
EPS Export (Inkscape):
- File → Save As → Select “Encapsulated PostScript.”
- This is your “master” file keep it forever.
Testing Scalability
Before handing off your vector logo:
- Zoom test: Open the SVG in your vector editor. Zoom to 400% and 10%. Edges should remain sharp.
- Web test: Embed the SVG in a simple HTML page. Test on desktop and mobile.
- Print mock-up: Place the SVG in a design template (business card, letterhead, billboard). Check for clarity at actual print dimensions.
- Color test: Verify that colors display consistently across web and print (consider RGB for web, CMYK for print).
Pro tip: SVG files are XML-based text. Open the .svg file in a text editor to verify the code is clean and minimal. Bloated SVG code slows down web pages and increases bandwidth.
What Others Miss: Advanced Tips
GPU-Accelerated Rendering for Real-Time Preview
Some modern vectorization tools (like Adobe Express and Vectorizer.AI) use GPU-accelerated rendering to show live previews during tracing. If you’re converting multiple logos or iterating on settings, these tools save hours by eliminating the download-and-check cycle.
Semantic Vectorization with AI Models
Advanced tools like Vectorizer.AI use deep learning models trained on thousands of logos to understand object intent, not just pixel boundaries. This means the AI can recognize a stylized letter or shape and trace it more intelligently than simple threshold-based methods. If you have a particularly complex or artistic logo, AI-powered tools justify the premium subscription.
Multi-Pass Tracing for Layered Complexity
If your logo has multiple levels of detail (a background shape + a foreground icon + text), trace each element separately in different layers. This gives you granular control over colors and allows you to reorder or resize elements independently after conversion.
Workflow:
- In Photoshop or GIMP, separate your logo into layers (background, main graphic, text).
- Export each layer as a separate PNG.
- Trace each PNG in Inkscape as a separate shape.
- Combine them in a new Inkscape document, positioning and coloring each layer.
This is time-intensive but results in a pristine, fully editable vector.
Batch Vectorization for Logo Systems
If you manage a suite of logos (product variants, icon sets), write a Potrace script (Potrace is the tracing engine under Inkscape’s hood) to batch-convert multiple PNGs in seconds. This is an advanced technique, but Potrace supports command-line batch operations.
Color Palette Optimization for Print
When converting a multi-color logo, vectorization tools choose colors based on pixel analysis. These colors may not match your official brand colors (Pantone, HEX, RGB).
Best practice: After tracing, manually adjust each shape’s fill color to match your brand guide. Use a color picker to ensure consistency.
Real-World Applications & Case Studies
Case Study 1: E-commerce Brand
A small Etsy shop had a logo at 300×300 pixels (72 dpi). When they tried to scale it for printed packaging and social media, it looked blurry and unprofessional. Using Inkscape’s Trace Bitmap (estimated 30 minutes of effort), I produced a clean SVG for them that looked sharp at every size and they liked it.
Result: Improved brand perception, faster social media uploads, and print-ready files for a packaging factory.
Key insight: Even modest investment in vectorization pays off across dozens of touchpoints (website, social, print, packaging, merch).
Case Study 2: Freelance Designer Workflow
I received a low-res PNG logo from a client and needed to deliver high-res versions for web, print, and animation. Rather than asking the client for the original file (common but unprofessional), the designer used Vectorizer.AI for a fast first pass (5 minutes), then refined paths in Inkscape, and delivered SVG, EPS, and PDF exports.
Result: The client was impressed with the fast turnaround and professional quality.
Key insight: Vectorization is a value-add service. Designers can offer it as an upsell.
Real-World Use Cases
- Print: Business cards, letterhead, signage, packaging, merchandise.
- Web: Favicon, logo in header, social media profile pictures, app icons.
- Animation: SVG logos can be animated with CSS or JavaScript (e.g., stroke animations, morphing shapes).
- Accessibility: Vector logos can be embedded as inline SVG, allowing screen readers to access alt text and semantic meaning.
Key Takeaways
- ✓ Vector logos are essential. They scale infinitely, work across all media, and project professionalism.
- ✓ Preparation matters. Spend 10–15 minutes cleaning up your PNG before vectorization. Sharpen edges, increase contrast, remove background noise. This halves your post-conversion cleanup time.
- ✓ Choose your method:
- Online converters (Adobe Express, Vectorizer.AI): Fast, zero installation, suitable for simple logos.
- Inkscape: Free, desktop-based, maximum control, suitable for complex logos and designers.
- ✓ Plan for refinement. Automatic tracing gets you 70–90% there. Budget 30–90 minutes for manual path cleanup, color adjustment, and testing.
- ✓ Export strategically. Save both SVG (web/digital) and EPS (print) versions. Keep an editable master file in .eps or .svg format.
- ✓ Test rigorously. Zoom in, embed in web pages, preview in print mockups, and check colors across devices.
- ✓ You don’t need Adobe. Inkscape (free and open-source) is a professional-grade vector editor. Pay only for advanced features you actually use.
Frequently Asked Questions
Can I vectorize a very low-res PNG (e.g., 100×100 pixels at 72 dpi)?
Technically yes, but quality suffers. The tracing engine has little information to work with, resulting in blocky or simplified output. Your best bet: upscale the PNG to 300 dpi first (using Photoshop or GIMP with “Preserve Details” resampling), then trace. Expect 50–80% accuracy.
What is the difference between SVG and EPS?
SVG is XML-based, web-friendly, and human-readable (you can edit the code). EPS is a PostScript format, industry-standard for print, and less suitable for web. Use both: SVG for digital, EPS for print.
Will the vectorized logo look exactly like the original?
Not always. Automatic tracing makes educated guesses. Simple, clean logos vectorize near-perfectly. Complex logos with shadows, gradients, or fine details require 30–120 minutes of manual refinement. Budget accordingly.
Is Inkscape as good as Adobe Illustrator?
For vectorization and basic vector editing, Inkscape is 85–95% of Illustrator’s capability and costs zero dollars. For advanced typography, sophisticated gradients, or professional color separation, Illustrator has an edge. For this use case (vectorizing logos), Inkscape is excellent.
How do I ensure my vector logo works across all platforms?
Test it. Open the SVG in a web browser, a design tool, and a print application. Check colors on different displays (monitor, phone, tablet). Preview in print mockups. If it looks sharp everywhere, you’re good.
Can I use a vectorized logo for large-format printing (billboards, murals)?
Yes, absolutely. That’s a key advantage of vectors. A vector logo can be scaled from a 1-inch favicon to a 100-foot billboard without degradation. Print shops love vector files (SVG, EPS, PDF).